By Mind Story

Picture source: Mind Story
This piece was first published on Mind Story’s Blog here on 20 May 2021.
We learn differently and the identified learning styles are visual, auditory, reading/writing and kinesthetic as developed in 1992 by Neil D. Fleming and Coleen E. Mills. We do have a preferred learning style or a preferred combination of learning styles. For younger children and children with special needs, pictures or images are a method of communication and provides good guidance on setting expectation on what is required of them. Creating a visual support provides an alternative way to communicate with your child.
What is Visual Support?
Visual support is basically information presented in an image format. With visual support, it provides a way to communicate for your child, similar to how hand sign works. It is a commonly used method to teach children with special needs but it works for children who have yet to acquire verbal communication. It is useful to present the information in an image format to associate with an object or task to complete or as a form of routine to train independent skills or communication.
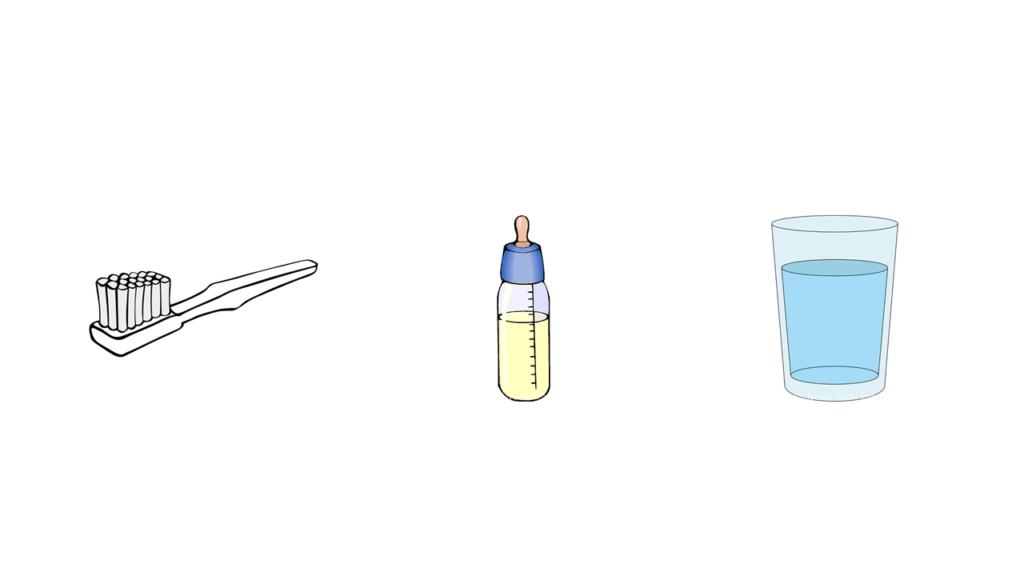
You can use visual support to teach your child a new skill or use it as a form of communication tool where your child can communicate their needs or choices. However, before you introduce the use of a visual support, you need to teach your child to associate the image with the specific action you want your child to perform. For example, a picture of toothbrush = brushing teeth, milk bottle = milk, glass = water, etc.
When to use visual support
As an object introduction
If you are using visual support, you would need to introduce the term and image to your child. For example, you want to associate the picture of toothbrush with the action of brushing teeth. You will present the picture of a toothbrush before you get your child to brush his teeth. Then, you show the toothbrush to your child and get into the action of brushing teeth. You can use any image that makes sense.
With the object introduction, you can have commonly requested items available for your child as a form of communication with you. If your child wants an apple, he / she can then pick up an apple image and present it to you. If he / she needs to go to the washroom, a toilet card would communicate their needs as well.
Teaching a skill

However, if you want to teach your child how to brush his teeth, then, you would need a few images to support the steps in brushing teeth, such as, toothbrush, toothpaste, toothpaste on toothbrush, brushing action, rinse and wipe. You would need to introduce each picture with the required action.
Show picture toothbrush –> Show toothbrush
Show picture toothpaste –> Show toothpaste
Show picture toothpaste on toothbrush –> Squeeze toothpaste on toothbrush
Show picture brushing action –> Start brushing teeth
Show picture faucet –> Spit out and rinse
Show picture towel –> Wipe
Teaching a routine
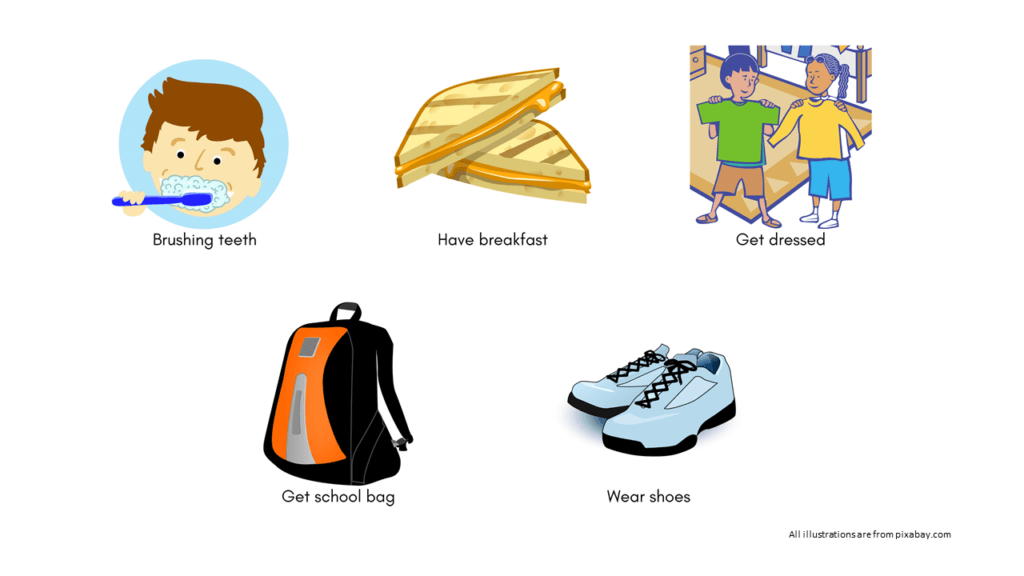
You can use visual support to establish a routine for your child. Similar to teaching a skill, you would need to introduce the image to the action that you would like your child to complete such as brushing teeth, have breakfast, change of clothes, pick up school bag, wear shoes.
You can print and cut out the images and line them up on clothes line or attach Velcro or magnets on the pictures (laminated for it to last longer). As your child completes each task, he / she can place it in a basket / envelope nearby. This acts as a guide for them to anticipate what is next and the number of tasks to complete.
As your child masters the necessary skills, you can introduce time by using a time card. Ideally, the image of the time card should match the clock that you have at home as your child will also learn how to read the time. When introducing time, you can place the time card with the action card together, e.g. 08:00 Have breakfast, to indicate what time you would want your child to perform the action.
Have fun with visual support!
Visual support is a way for your child to communicate with you. It is also a great tool if you would like to introduce vocabulary into your child’s daily living. It is important to note that for every image used, must be introduced to your child for them to know what you expect them to do when the image is presented. Visual support sets clear expectations and communication for your child. You would need to assess if your child is clear with the intended communication by checking their response to each image. In addition, I would recommend introducing one image per day if you have more than one image to the task or routine. As your child masters each image or gets familiar with the visual support, you can then increase the images you teach per day, or make it into a fun activity in the car or use it in school or at the supermarket.
If you are looking for more visual support for children with autism, National Autistic Society, UK has them laid out for you here.